IntelliJ IDE
General tips:
- Press F1 when your cursor is on a method or variable to see its java documentation.
- To run a class, right click on it in the file view and choose Run
main(). If it doesn’t have that option, be sure your class has apublic static void main(String args[])function and that you made args be an array!- Or you can click the green “play button” that will appear next to your
main()function in the editor.
- Or you can click the green “play button” that will appear next to your
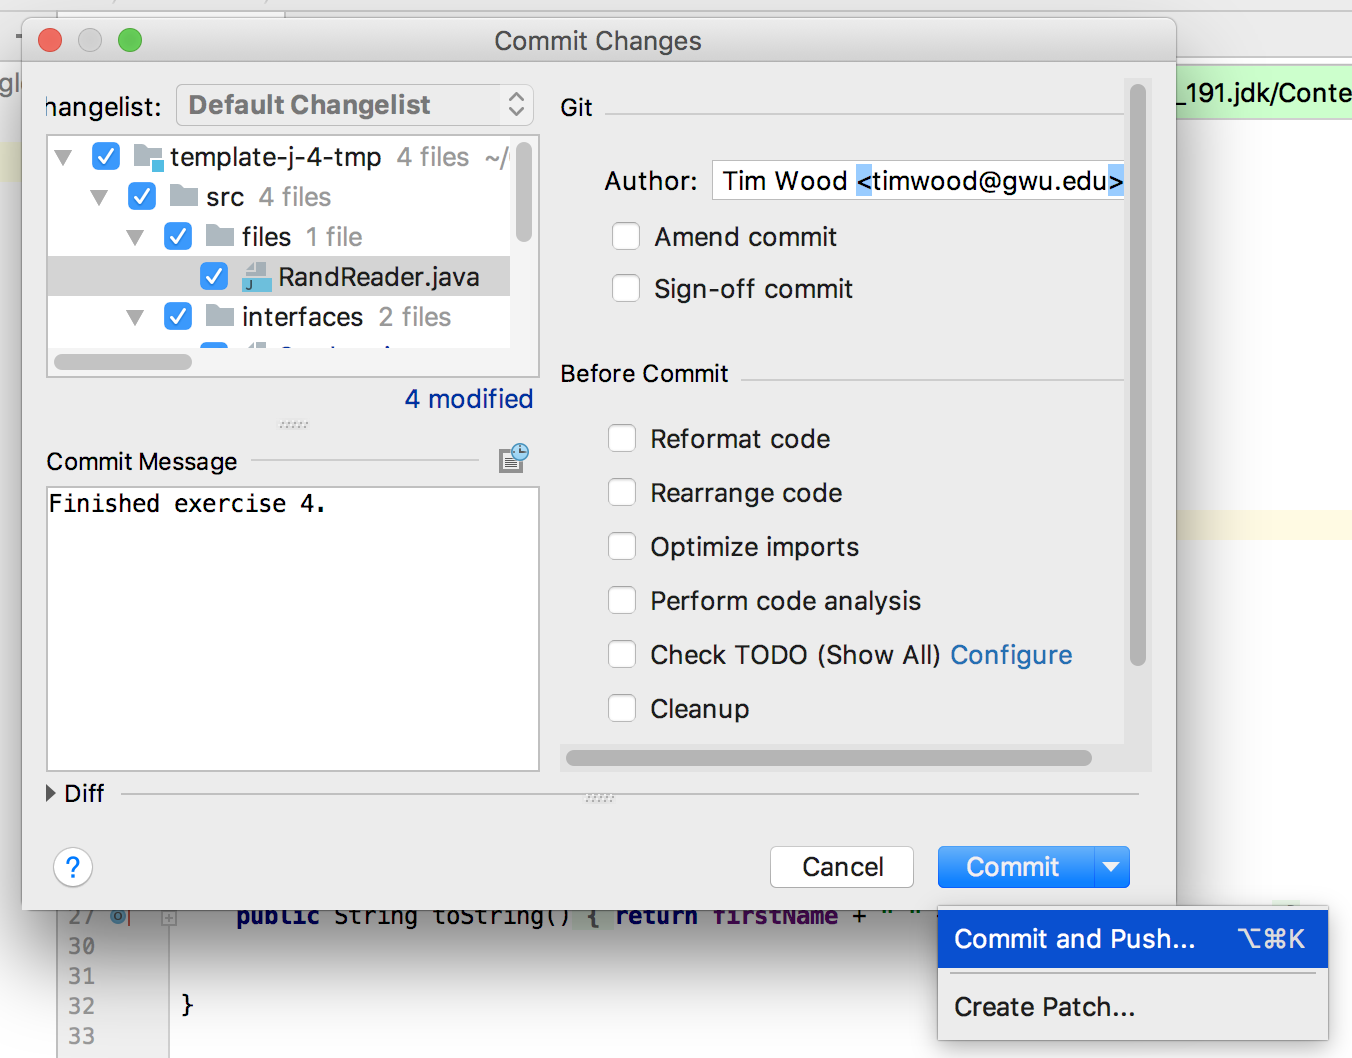
- You can use IntelliJ to commit and push your code to GitHub.
- From the
VCSmenu chooseCommitand be sure your modified files are all selected. - Inside the commit window, type your message and type your name in the top right
- Uncheck all boxes under
Before Commit - Be sure to click the little arrow next to Commit and select
Commit and Push- Otherwise your code will not be uploaded!
- Your screen should look like:
- From the
Reducing the amount of pointless suggestions IntelliJ gives. This will eliminate many of the light bulb icons that IntelliJ adds for minor language features that we don’t particularly care about.
- Open the Settings (Windows) or Preferences (Mac) window in IntelliJ.
- Expand Editor and click Inspections
- At the top of window change the Profile to “Stored in IDE - Default”
- Click on Java and then on the right side of the window change the Severity to Typo
Importing a project from github.
- Click the
VCSmenu and chooseCheckout from Version Control...and pickGit. OR from the Welcome screen clickCheckout from Version Control...- IMPORTANT: DO NOT TRY TO CHECK OUT A PROJECT BY SELECTING
New -> Project from Verson Control. This will not work correctly!
- IMPORTANT: DO NOT TRY TO CHECK OUT A PROJECT BY SELECTING
- You do not need to click Login to GitHub, just enter the git URL you want to clone.
- Click Yes when IntelliJ asks you about creating a new project. Continue to click Next/Yes until the project opens.
No SDK Warning:
- If you get a message at the top of the screen saying there is no SDK selected, then you will not be able to compile or run any java programs.
- To solve this, click the button to configure an SDK.
- Hit the plus button or hit “New…” and select JDK
- This should give a file browser. Go to where the Java JDK is installed (see below), which is most likely something like
C:\Program Files\Java\jdk1.8on Windows.
No Output Directory Error:
- This usually happens when you did not follow the instructions above for importing a github repo into a new project - so try to follow that again carefully! (i.e., NEVER use File->New)
- If you still have the problem, then in the Project Structure menu there is a place to specify an output directory. Use that to create a new folder named
outinside your project and select that. This is where IntelliJ will place your compiled files.
Installation.
- Full instructions
- Install Java JDK 8 or later (If you haven’t installed it before)
- Install IntelliJ IDEA
- Get Git:
- Windows: Download Git from https://git-scm.com/, and install the downloaded file. Then In IntelliJ: File -> Settings -> Version Control -> Git -> Path to Git executable Change the path to
C:\Program Files\Git\cmd\git.exe - Mac: in the terminal run:
xcode-select --install
- Windows: Download Git from https://git-scm.com/, and install the downloaded file. Then In IntelliJ: File -> Settings -> Version Control -> Git -> Path to Git executable Change the path to